
Customizing Azure Cloud Shell with Zsh and Fish for use with Terraform, Git and Kubernetes
We’ll go over customizing your Azure Cloud Shell in a way that helps you get things done on a daily basis in vim, git, terraform and kubernetes.
Azure Cloud shell is super handy because you can get to it over the web, it stores your settings, and if set up correctly, can allow for resumable sessions!
Note that you can also load it from VS Code / VS Codium in the console area – which we’ll cover at the very end <3
Custom Browser Font
First, you’ll need a proper font for your browser. In my case, Chromium at the moment, but Firefox is similar. Essentially we’ll be adding a patched font to the browser so that we can use it when we’re in the web version of Azure’s Cloud Shell. I use Nerd Fonts, but there’s also Powerline fonts. If you need something to help make up your mind: NerdFonts are generally larger in memory but also contain many more symbols. Powerline fonts are smaller.
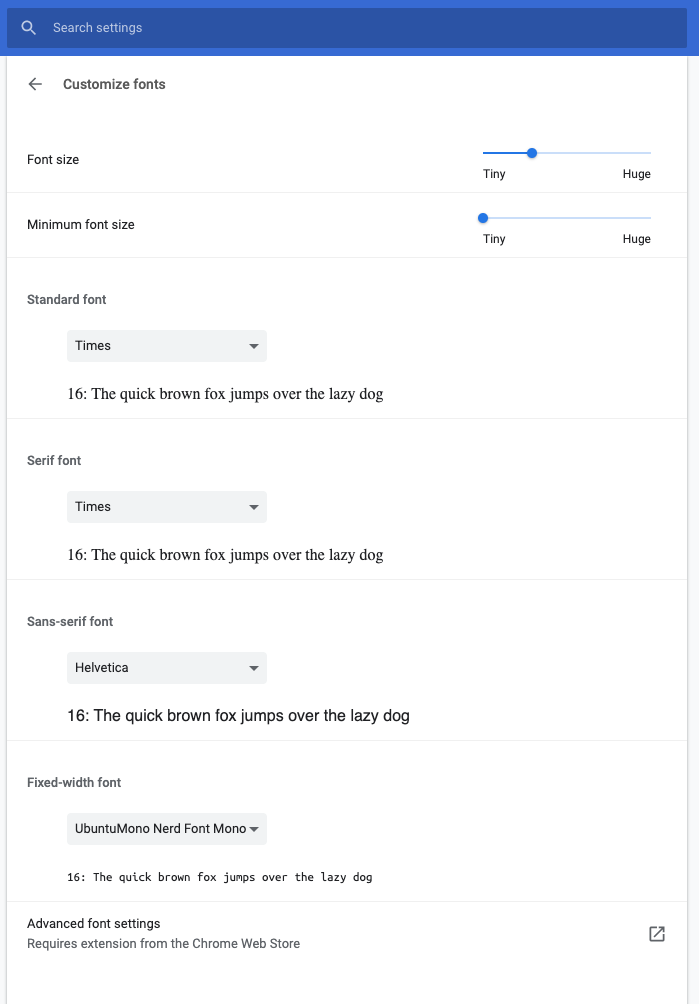
In chrome://settings/fonts set the monospaced font to your downloaded patched font. You can try a few if you feel like the symbols aren’t great. I use Ubuntu Mono.
Chrome font settings screen:
Selecting Ubuntu Mono from the list:

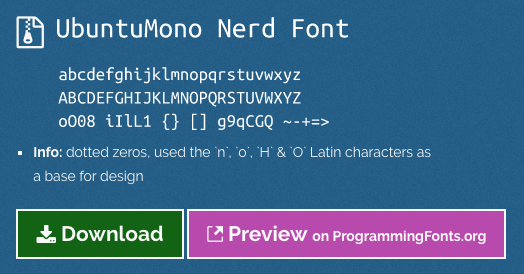
Preview of Ubuntu Mono:
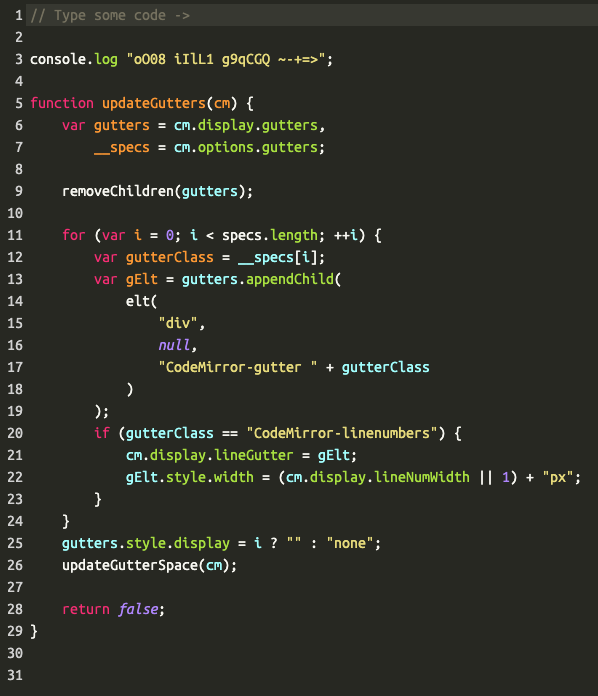
Test your new font with:
curl https://raw.githubusercontent.com/ryanoasis/nerd-fonts/master/bin/scripts/test-fonts.sh | bash - | more
Linuxbrew / Homebrew
Now let’s install homebrew with:
sh -c "$(curl -fsSL https://raw.githubusercontent.com/Linuxbrew/install/master/install.sh)"
sh -c "$(curl -fsSL https://raw.githubusercontent.com/Linuxbrew/install/master/install.sh)"

==> This script will install:
/home/linuxbrew/.linuxbrew/bin/brew
/home/linuxbrew/.linuxbrew/share/doc/homebrew
/home/linuxbrew/.linuxbrew/share/man/man1/brew.1
/home/linuxbrew/.linuxbrew/share/zsh/site-functions/_brew
/home/linuxbrew/.linuxbrew/etc/bash_completion.d/brew
/home/ryan/.cache/Homebrew/
/home/linuxbrew/.linuxbrew/Homebrew
==> The following new directories will be created:
/home/linuxbrew/.linuxbrew/bin
/home/linuxbrew/.linuxbrew/etc
/home/linuxbrew/.linuxbrew/include
/home/linuxbrew/.linuxbrew/lib
/home/linuxbrew/.linuxbrew/sbin
/home/linuxbrew/.linuxbrew/share
/home/linuxbrew/.linuxbrew/var
/home/linuxbrew/.linuxbrew/opt
/home/linuxbrew/.linuxbrew/share/zsh
/home/linuxbrew/.linuxbrew/share/zsh/site-functions
/home/linuxbrew/.linuxbrew/var/homebrew
/home/linuxbrew/.linuxbrew/var/homebrew/linked
/home/linuxbrew/.linuxbrew/Cellar
/home/linuxbrew/.linuxbrew/Caskroom
/home/linuxbrew/.linuxbrew/Homebrew
/home/linuxbrew/.linuxbrew/Frameworks

Press RETURN to continue or any other key to abort
Some fun output, note the portable ruby:
==> Downloading https://linuxbrew.bintray.com/bottles-portable-ruby/portable-ruby-2.6.3.x86_64_linux.bottle.tar.gz
######################################################################## 100.0%
==> Pouring portable-ruby-2.6.3.x86_64_linux.bottle.tar.gz
==> Homebrew is run entirely by unpaid volunteers. Please consider donating:
  https://github.com/Homebrew/brew#donations
==> Tapping homebrew/core
Cloning into '/home/linuxbrew/.linuxbrew/Homebrew/Library/Taps/homebrew/homebrew-core'...
remote: Enumerating objects: 5155, done.
remote: Counting objects: 100% (5155/5155), done.
remote: Compressing objects: 100% (4952/4952), done.
remote: Total 5155 (delta 48), reused 300 (delta 6), pack-reused 0
Receiving objects: 100% (5155/5155), 4.37 MiB | 0 bytes/s, done.
Resolving deltas: 100% (48/48), done.
Checking connectivity... done.
Tapped 3 commands and 4933 formulae (5,196 files, 13.6MB).
Already up-to-date.
==> Installation successful!

==> Homebrew has enabled anonymous aggregate formulae and cask analytics.
Read the analytics documentation (and how to opt-out) here:
  https://docs.brew.sh/Analytics

==> Homebrew is run entirely by unpaid volunteers. Please consider donating:
  https://github.com/Homebrew/brew#donations
==> Next steps:
- Install the Homebrew dependencies if you have sudo access:
  Debian, Ubuntu, etc.
    sudo apt-get install build-essential
  Fedora, Red Hat, CentOS, etc.
    sudo yum groupinstall 'Development Tools'
  See https://docs.brew.sh/linux for more information.
- Configure Homebrew in your ~/.profile by running
    echo 'eval $(/home/linuxbrew/.linuxbrew/bin/brew shellenv)' >>~/.profile
- Add Homebrew to your PATH
    eval $(/home/linuxbrew/.linuxbrew/bin/brew shellenv)
- We recommend that you install GCC by running:
    brew install gcc
- Run `brew help` to get started
- Further documentation:
    https://docs.brew.sh
Warning: /home/linuxbrew/.linuxbrew/bin is not in your PATH.
Once done, we’ll need to fix the path: echo 'eval $(/home/linuxbrew/.linuxbrew/bin/brew shellenv)' >>~/.bashrc && . ~/.bashrc
If all went well, we should be able to run brew and see the following:
brew
Example usage:
  brew search [TEXT|/REGEX/]
  brew info [FORMULA...]
  brew install FORMULA...
  brew update
  brew upgrade [FORMULA...]
  brew uninstall FORMULA...
  brew list [FORMULA...]

Troubleshooting:
  brew config
  brew doctor
  brew install --verbose --debug FORMULA

Contributing:
  brew create [URL [--no-fetch]]
  brew edit [FORMULA...]

Further help:
  brew commands
  brew help [COMMAND]
  man brew
  https://docs.brew.sh
Homebrew command line apps:
- azure-cli
- terraform
- ansible
- ripgrep
- exa
- bat
- curl (current)
- mc (think Norton Commander, but better)
- zsh with zsh-git-prompt
- bash with bash-git-prompt
- fish
- Current GNU coreutils (https://www.gnu.org/software/coreutils)
All-in-one install:
brew install terraform ansible azure-cli ripgrep exa bat fzf zsh fish tmux mc curl coreutils
Git
Now we can proceed to add the tools we’ll need. I’ll try to categorize them so that you don’t end up with stuff you don’t want. Remember: though this can be your primary console with some work-arounds, most likely you’ll want to make this set up portable in your dotfiles and sync things via git. We’ll start there:
export PS1='\w\[\033[0;32m\]$(__git_ps1) \[\033[0;32m\]─\[\033[0m\033[0;32m\] \$\[\033[0m\033[0;32m\] ▶\[\033[0m\] '
This simple one-liner results in the following for your Bash prompt:

Note: if you want to further customize the Bash prompt colours and to add blinking: https://misc.flogisoft.com/bash/tip_colors_and_formatting
Now let’s clone a git repo (git is installed by default in Azure Cloud Shell):
git clone https://github.com/Azure/terraform-azurerm-compute.git
You can see from the prompt we’re in the master branch!

Sample git prompts (oh-my-fish and oh-my-zsh are defaults, rainbowbrite used for bash-it, in order):

Custom Shells
I’d recommend not modifying the bash shell too much as it’s our default, and there’s no way to change it at present. Similarly, though we can install a new bash shell version, we need to chain-load it in order to have it auto-load. That being said, you probably won’t need a bash that’s up to date at this point.
Other helpers
For the Fish fan: Oh-my-fish (make sure fish is already installed via brew install fish)
curl -L https://get.oh-my.fish | fish
For the original zshers, or those that are ok with the new macOS default: oh-my-zsh (note: changing the default shell will fail because we don’t have a password 🙂 )
sh -c "$(curl -fsSL https://raw.github.com/ohmyzsh/ohmyzsh/master/tools/install.sh)"
For the Bash users: bash-it
git clone --depth=1 https://github.com/Bash-it/bash-it.git ~/.bash_it
~/.bash_it/install.sh --silent
FZF (fuzzy finder):
brew install fzf && (brew --prefix)/opt/fzf/install
Kubernetes
Homebrew packages for K8s usage:
brew install kubectx kube-ps1 istioctl linkerd helm stern kubeaudit derailed/k9s/k9s derailed/popeye/popeye
In either your ~/.bashrc and/or ~/.zshrc shell configs:
source "/home/linuxbrew/.linuxbrew/opt/kube-ps1/share/kube-ps1.sh"
PS1='$(kube_ps1)'$PS1
For krane, you’ll need ruby first:
brew install ruby && . ~/.zshrc # or your bash/fish config
gem install krane
Doom Emacs
brew tap daviderestivo/emacs-head
brew install emacs-head --HEAD --with-modules
git clone https://github.com/hlissner/doom-emacs ~/.emacs.d
~/.emacs.d/bin/doom install
Vim
brew install neovim --HEAD
git clone https://github.com/k-takata/minpac.git ~/.config/nvim/pack/minpac/opt/minpac
echo 'set clipboard+=unnamed' >> ~/.config/neovim/init.vim
tmux
tmux --HEAD --with-utf8proc

# Fix Scrolling
tee ~/.tmux.conf <<EOF
unbind +
bind + \
  new-window -d -n tmux-zoom 'clear && echo TMUX ZOOM && read' \;\
  swap-pane -s tmux-zoom.0 \;\
  select-window -t tmux-zoom

unbind -
bind - \
  last-window \;\
  swap-pane -s tmux-zoom.0 \;\
  kill-window -t tmux-zoom
EOF

# Kubernetes tmux
wget -O ~/kube.tmux https://raw.githubusercontent.com/jonmosco/kube-tmux/master/kube.tmux
echo 'set -g status-right "#(/bin/bash $HOME/.tmux/kube.tmux 250 red cyan)"' >> ~/.tmux.conf